Log in to the Wall platform and navigate to the Mandate Section
Initiate a new mandate request, and choose a preferred authentication method: net banking, debit card, or Aadhaar-based verification.
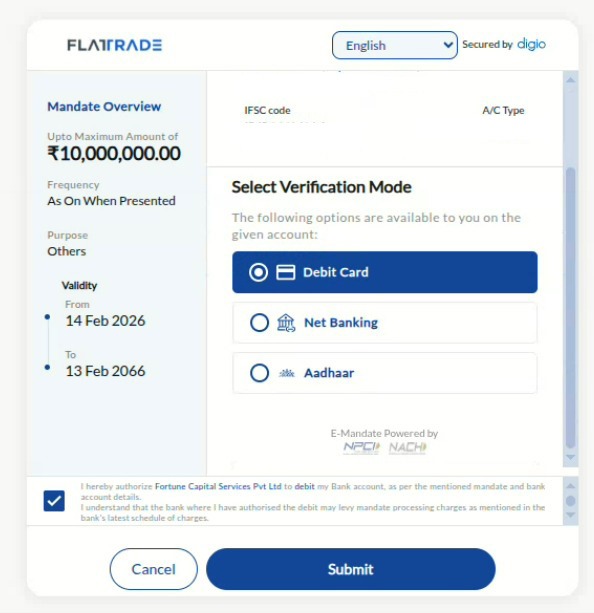
The below process if for debit card-based verification
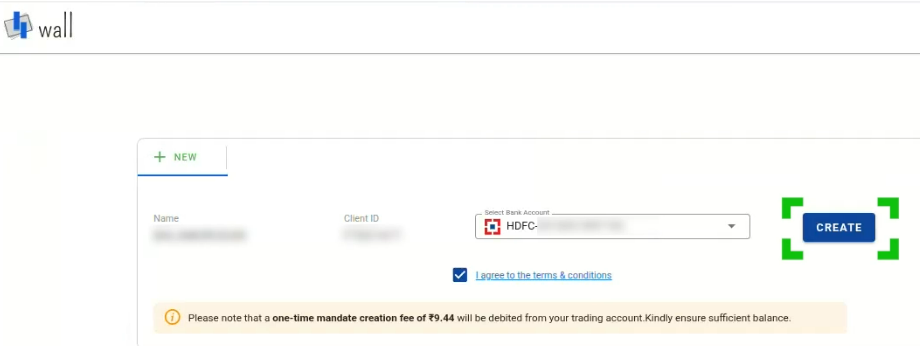
You can create a mandate for your preferred bank account and make sure to tick the terms and conditions box
Click create
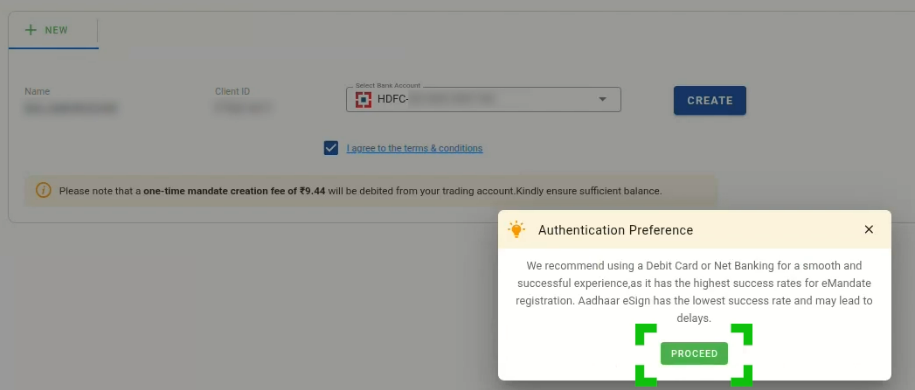
Click Proceed on the pop-up
Verify the details, make sure to tick the authorization box, and click Submit
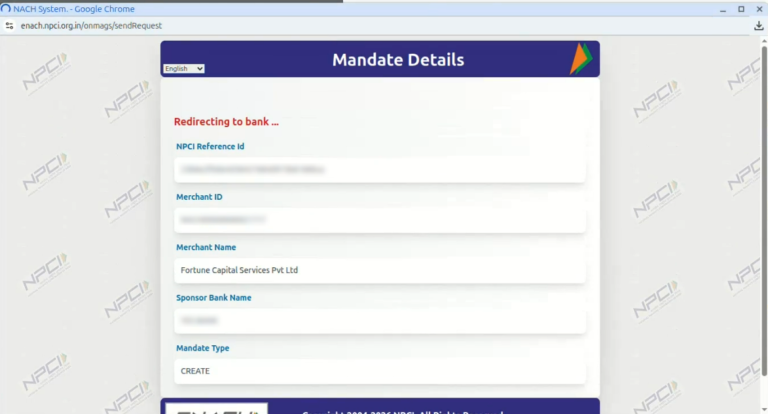
After this, you will be redirected to the NPCI page.
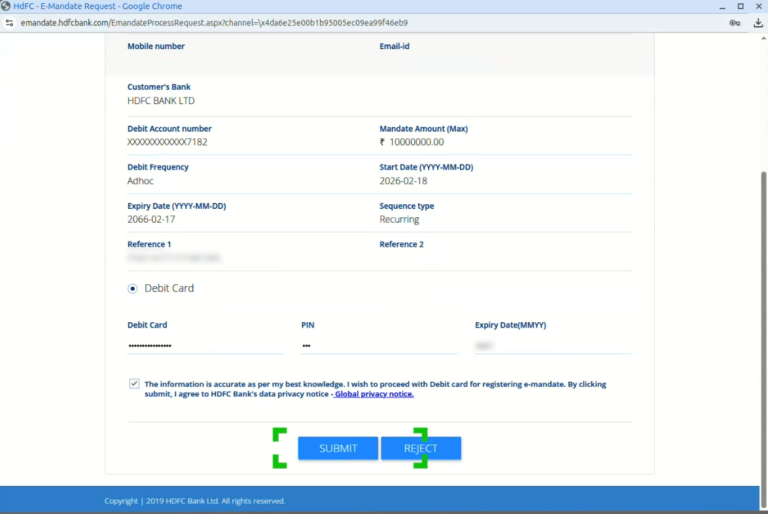
Scroll down a little and enter your card details (Since you have chosen the Debit card-based authentication method)
Make sure to tick the authorization box and then click Submit.
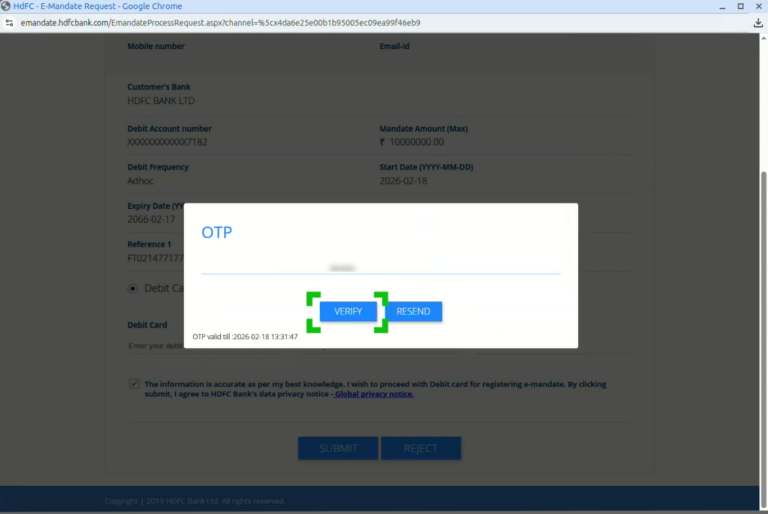
Enter the OTP received through your mobile number and submit
After this authentication, your mandate is created successfully.
It takes upto 7 days, for the bank to authenticate the mandate
Note:
Make sure your trading account ledger has a mandate creation charge of ₹8 + GST available.
When you initiate the mandate using net banking or debit card, a mandate creation charge of ₹7.50 is applied.
Once authenticated, the mandate remains valid for up to 10 days.
If the mandate is rejected by the bank (NACH), charges will be applied based on the bank’s response.
Note: If the mandate creation is initiated but not authenticated within 10 days, the mandate creation charge will be reverted. Similarly, during account opening, a creation charge of Rs. 8 + GST is held until the authentication type (debit card, net banking, or Aadhaar) is confirmed. Once authenticated through net banking or debit card, a reversal of Rs. 0.5 is processed.
 Web Trading
 Backoffice
 IPO Apply
 Manage Account
 Wall
Wall Kosh
Kosh